

Introduction
Have you ever found yourself in a situation where your Wi-Fi just doesn’t cut it? Maybe you’re in a spot with weak signals, or perhaps you’re looking for a more stable and faster internet connection. Enter the Belkin USB-C to Ethernet adapter—a handy tool that lets you connect your device to the internet via an Ethernet cable. But before you can start surfing the web with speed and reliability, there’s one small task to take care of: downloading and installing the Belkin USB-C to Ethernet driver. Don’t worry; it’s easier than you think! In this article, we’ll walk you through the steps to get your driver up and running on both Windows and macOS. Ready? Let’s dive in.
Table of Contents
- Introduction
- Why You Need the Belkin USB-C to Ethernet Driver
- Where to Download the Belkin USB-C to Ethernet Driver
- Downloading the Driver for Windows
- Downloading the Driver for macOS
- Installing the Driver on Windows
- Installing the Driver on macOS
- Troubleshooting Common Issues
- Updating the Belkin USB-C to Ethernet Driver
- Checking Compatibility
- Manual Installation of the Driver
- Conclusion
- Frequently Asked Questions
Why You Need the Belkin USB-C to Ethernet Driver
The first question you might be asking is, why do I need to install a driver in the first place? Think of the driver as a translator between your device and the Ethernet adapter. Without it, your computer wouldn’t know how to communicate with the adapter, rendering it useless. Whether you’re using Windows or macOS, this driver ensures that your device recognizes the adapter and allows it to function correctly.
Where to Download the Belkin USB-C to Ethernet Driver
Finding the right place to download the driver is crucial. The official Belkin website is your best bet for downloading a safe and up-to-date version of the Belkin USB-C to Ethernet driver. Alternatively, you can use trusted third-party websites if you know what you’re doing, but be cautious to avoid malicious downloads.
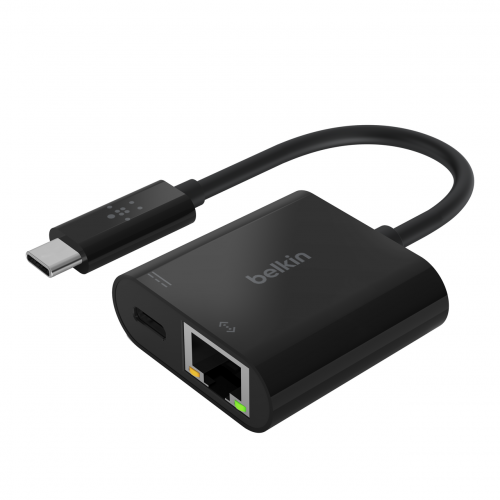
For those looking to purchase the adapter, you can do so directly from Promallshop.
Downloading the Driver for Windows
Let’s get started with the Windows operating system. Here’s how you can download the driver:
- Visit the Official Belkin Website: Go to the Belkin support page.
- Search for the Adapter Model: Enter your adapter model number in the search bar. This can usually be found on the packaging or the device itself.
- Select the Appropriate Driver: Choose the driver compatible with your version of Windows (e.g., Windows 10 or 11).
- Click Download: Once you’ve selected the correct driver, click the download button.
Downloading the driver is usually quick, depending on your internet connection. Once it’s downloaded, you’re ready to move on to the installation.
Downloading the Driver for macOS
If you’re a Mac user, the process is slightly different but just as straightforward:
- Go to the Belkin Support Page: Navigate to the official Belkin website.
- Identify Your Adapter: Use the model number to search for the driver compatible with macOS.
- Choose Your macOS Version: Select the driver that matches your macOS version (e.g., macOS Monterey or Big Sur).
- Initiate the Download: Click the download link to start downloading the driver.
With the driver downloaded, you’re all set to install it on your Mac.
Installing the Driver on Windows
Now that you’ve downloaded the driver, it’s time to install it on your Windows machine:
- Locate the Downloaded File: Open your downloads folder and find the driver file.
- Run the Installer: Double-click the file to start the installation process.
- Follow On-Screen Instructions: The installer will guide you through the process. Usually, it’s just a matter of clicking “Next” a few times.
- Restart Your Computer: After the installation, it’s a good idea to restart your computer to ensure the driver is properly installed.
Once your computer restarts, you should be able to plug in your Belkin USB-C to Ethernet adapter and get online without any issues.
Installing the Driver on macOS
Installing the driver on a Mac is just as easy:
- Find the Downloaded File: Locate the driver file in your Downloads folder.
- Open the Installer: Double-click the file to launch the installation.
- Proceed with Installation: Follow the prompts on the screen, which usually involve a few clicks.
- Restart Your Mac: After installation, restart your Mac to finalize the setup.
Once your Mac has rebooted, connect the Belkin adapter, and you should be good to go.
Troubleshooting Common Issues
Sometimes, things don’t go as smoothly as we’d like. If you encounter issues during installation, here are some common problems and how to fix them:
- Driver Not Recognized: If your computer doesn’t recognize the driver, ensure that you’ve downloaded the correct version for your operating system.
- Installation Failed: This might happen if you don’t have administrative privileges on your device. Try running the installer as an administrator.
- Adapter Not Working Post-Installation: Make sure your Ethernet cable is properly connected, and try restarting your computer.
If all else fails, visiting the Belkin support page or contacting their customer service can help resolve any persistent issues.
Updating the Belkin USB-C to Ethernet Driver
Keeping your drivers up-to-date is essential for optimal performance. Here’s how you can update the Belkin USB-C to Ethernet driver:
- Visit the Belkin Support Page: Regularly check for driver updates on the official Belkin website.
- Download the Latest Driver: If a new version is available, download it following the steps outlined earlier.
- Install the Updated Driver: Install it as you would any other software update, ensuring your system has the latest enhancements and bug fixes.
Checking Compatibility
Before downloading any driver, it’s crucial to check that it’s compatible with your system. Not all drivers are created equal, and using the wrong one can lead to malfunctions or system errors. Make sure you know your operating system’s version and whether your computer is 32-bit or 64-bit.
Manual Installation of the Driver
In rare cases, you might need to install the driver manually. This involves a few more steps but is doable:
- Extract the Driver Files: Right-click on the downloaded driver file and select “Extract All.”
- Access Device Manager: On Windows, open Device Manager, find your Ethernet adapter, and right-click it.
- Update Driver: Choose “Update driver,” then select “Browse my computer for drivers,” and navigate to the folder where you extracted the files.
- Install the Driver: Follow the prompts to complete the manual installation.
This method is handy if the automatic installer fails for any reason.
Conclusion
Downloading and installing the Belkin USB-C to Ethernet driver is a straightforward process, whether you’re on Windows or macOS. By following the steps outlined above, you can ensure a stable and fast internet connection through your Ethernet adapter. Remember to keep your driver updated and troubleshoot any issues that arise to maintain optimal performance.
Frequently Asked Questions
You can check for updates on the Belkin support page or use the Device Manager on Windows to see if an update is available.
Yes, the adapter can be used on any device that supports USB-C and has the correct driver installed.
Ensure the driver is installed correctly, check the USB-C port for damage, and restart your computer.
Yes, the driver is free to download from the official Belkin website.
The issue might be related to your network or the Ethernet cable. Try using a different cable or testing your connection speed with another device.