Introduction
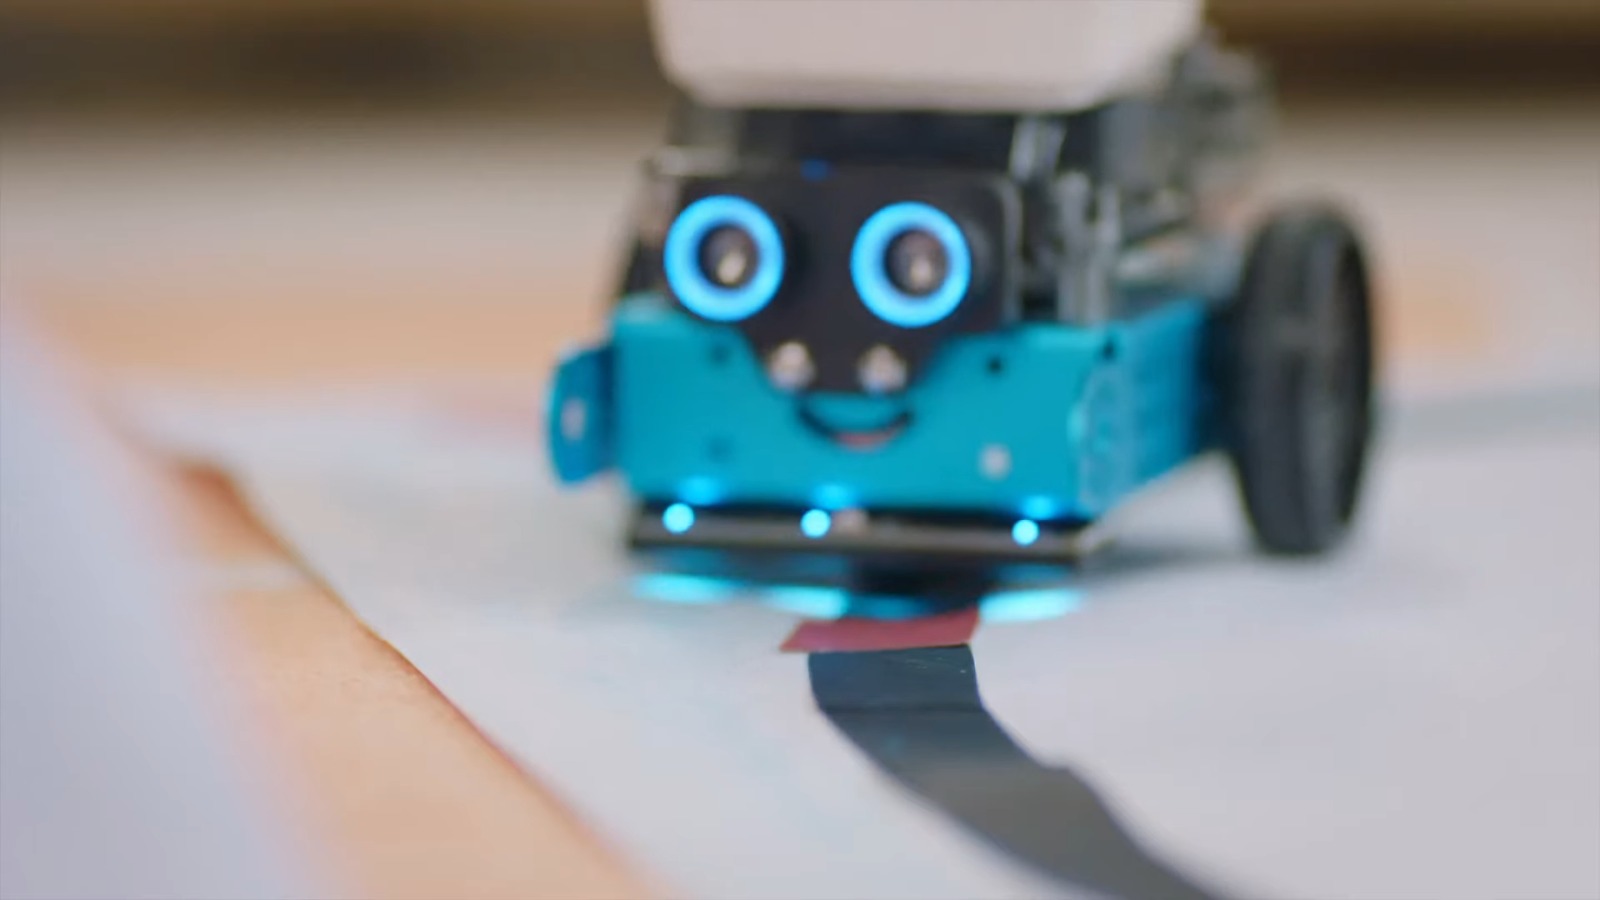
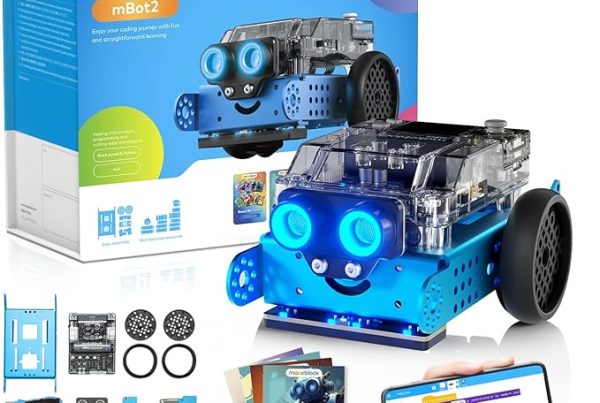
Upgrading your mBot 2 is like giving it a superpower—it suddenly becomes faster, smarter, and more capable of performing complex tasks. This article is your ultimate guide to understanding how to enhance your mBot 2 with the right add-ons and accessories. We’ll walk you through the best options, provide tips on installation, and explore how these enhancements can make your mBot 2 a true powerhouse of robotics.
Table of Contents
- Introduction
- Why Upgrade Your mBot 2 with Accessories?
- Top Add-Ons to Enhance mBot 2
- Programming Tools for mBot 2 Customization
- How to Integrate Sensors with mBot 2
- Exploring mBot 2 Expansion Packs
- Advanced Controls and Automation Features
- mBot 2 Educational Tools for Learning and Fun
- Optimizing mBot 2 for Better Performance
- Conclusion
Why Upgrade Your mBot 2 with Accessories?
Imagine you’ve just bought a new smartphone. It’s great on its own, but you soon realize there’s so much more you could do with it if you added a case, extra storage, or a high-quality camera lens. Similarly, your mBot 2, straight out of the box, is an amazing piece of technology—but it has the potential to do so much more.
Upgrading your mBot 2 isn’t just about improving its performance; it’s about unlocking new features and expanding its functionalities. Whether you want to introduce more complex movements, enhance sensory capabilities, or just have fun experimenting with new components, upgrading your mBot 2 will open doors to endless possibilities.
Why Should You Care?
Investing time and resources into upgrading your mBot 2 can lead to a more rewarding experience. Not only will you enhance your knowledge of robotics, but you’ll also create a robot tailored to your specific needs and interests.
Top Add-Ons to Enhance mBot 2
When it comes to upgrading your mBot 2, the sky’s the limit. There are numerous add-ons and accessories available that can help you customize your robot to perform specific tasks or simply improve its overall performance. Here are some of the top add-ons you should consider:
Sensors
Sensors are the eyes, ears, and touch of your mBot 2. They allow your robot to interact with its environment in a meaningful way. Here are a few popular sensor add-ons:
- Ultrasonic Sensor: Perfect for detecting obstacles and navigating around them. This sensor can prevent your mBot 2 from bumping into walls or objects.
- Line-Following Sensor: Ideal for programming your mBot 2 to follow a specific path. This is great for creating automated routes or races.
- Temperature Sensor: Allows your robot to monitor and react to changes in temperature, which could be used for environmental projects or experiments.
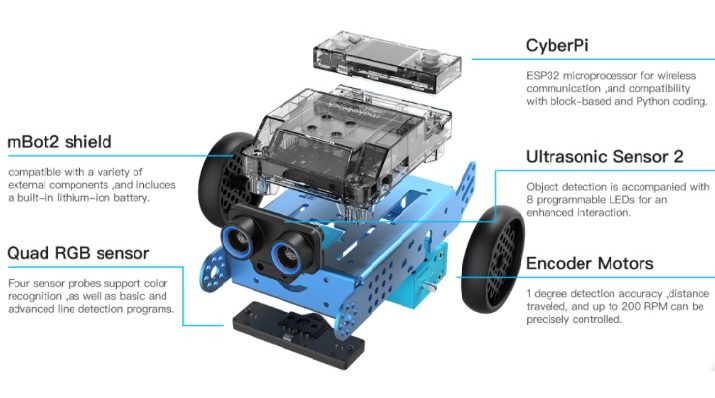
Actuators
Actuators are the muscles of your mBot 2. They control movement and action, making your robot dynamic and responsive.
- Servo Motors: These are perfect for creating precise movements. Use them to control arms, legs, or any part of the robot that requires exact positioning.
- DC Motors: These motors are great for enhancing speed and power. They can be used to upgrade the mBot 2’s wheels or other moving components.
Structural Components
These add-ons are like the skeleton of your mBot 2, providing support and shape.
- Building Blocks: These allow you to expand your robot’s structure, giving it new shapes and forms. You can create entirely new designs by simply adding or modifying blocks.
- Chassis Kits: Enhance the stability and durability of your mBot 2 with a stronger chassis. This is particularly useful if you’re planning to add more weight or components to your robot.
Programming Tools for mBot 2 Customization
Upgrading the hardware of your mBot 2 is just one side of the coin. To truly make the most out of your robot, you need to dive into programming. Luckily, there are numerous tools available that can help you code and customize your mBot 2’s behavior.
mBlock Programming Software
mBlock is an intuitive, block-based programming tool that’s perfect for beginners and experts alike. It allows you to create complex programs by simply dragging and dropping blocks of code. If you’re more advanced, you can switch to Python or Arduino IDE for more precise control.
Integration with Scratch
If you’re familiar with Scratch, you’ll love how easily it integrates with mBot 2. You can use Scratch to create fun and interactive programs, making it a great way to introduce coding to younger users or those new to robotics.
How to Integrate Sensors with mBot 2
Integrating sensors with your mBot 2 is like giving it a sixth sense. These sensors allow the robot to perceive its surroundings and make intelligent decisions based on the data it collects.
Step-by-Step Guide to Adding Sensors
- Choose Your Sensor: Decide what functionality you want to add to your mBot 2. For instance, if you want it to avoid obstacles, an ultrasonic sensor would be ideal.
- Attach the Sensor: Most sensors can be easily attached to your mBot 2 using the provided ports. Make sure the sensor is securely connected.
- Program the Sensor: Use mBlock or any other compatible programming tool to write a program that dictates how the sensor will behave. For example, you can program the robot to stop moving when the ultrasonic sensor detects an obstacle.
- Test and Calibrate: After programming, test the sensor to ensure it’s working correctly. Calibration may be necessary to fine-tune its sensitivity.
Why Sensor Integration Matters
Integrating sensors into your mBot 2 not only enhances its performance but also makes it more autonomous. Your robot can start making decisions on its own, reacting to the environment without constant input from you.
Exploring mBot 2 Expansion Packs
Expansion packs are the secret sauce that can transform your mBot 2 into a specialized machine tailored to specific tasks. These packs often include a combination of sensors, actuators, and structural components, all designed to work together seamlessly.
Popular Expansion Packs
- mBot Add-On Pack—Servo Pack: This pack is perfect for adding mechanical arms or other moving parts to your mBot 2. It includes servos, structural components, and the necessary cables for easy integration.
- mBot Add-On Pack—Six-Legged Robot: Want to give your mBot 2 a new look? This pack allows you to turn your robot into a six-legged creature, enhancing its mobility and making it more versatile.
- mBot Ranger Transformable STEM Robot Kit: This is an advanced kit that allows you to transform your mBot 2 into different forms, such as a tank or a racing car, providing endless possibilities for customization.
How to Use Expansion Packs
Using expansion packs is straightforward. Each pack comes with detailed instructions, and you can often find online tutorials that guide you through the installation and programming process. The key is to choose a pack that aligns with your goals for the mBot 2.
Advanced Controls and Automation Features
Imagine driving a car that can think and act on its own, avoiding obstacles, adjusting its speed, and even parking itself. With advanced controls and automation features, you can bring that same level of intelligence to your mBot 2.
Remote Control Capabilities
With the addition of a remote control or a smartphone app, you can guide your mBot 2 from a distance. This is great for demonstrations, competitions, or just having fun. The mBot 2’s remote control capabilities are enhanced with Bluetooth or Wi-Fi modules, allowing you to control it from virtually anywhere.
Automation Features
By integrating sensors and programming your mBot 2 with specific algorithms, you can automate tasks such as line-following, obstacle avoidance, or even more complex behaviors like interacting with other robots. The mBot 2 can be programmed to perform tasks autonomously, making it an ideal tool for learning about robotics and automation.
Why Go Advanced?
Advanced controls and automation features are not just for show. They provide practical benefits, such as reducing the need for manual intervention and allowing your mBot 2 to perform tasks more efficiently and accurately.
mBot 2 Educational Tools for Learning and Fun
One of the most exciting aspects of the mBot 2 is its educational potential. It’s not just a toy; it’s a powerful learning tool that can teach coding, robotics, and engineering in a fun and engaging way.
Educational Add-Ons
There are several educational tools and add-ons available for the mBot 2 that can enhance the learning experience:
- LED Matrix Display: This add-on allows you to display text, images, or animations on your mBot 2. It’s a great way to learn about programming displays and can be used in projects where visual feedback is important.
- Light and Sound Modules: These modules can be used to teach concepts like light intensity, sound frequency, and signal processing. They are also great for creating interactive projects where the mBot 2 responds to changes in light or sound.
- Data Logging Modules: These modules allow you to record and analyze data from your mBot 2’s sensors, providing a hands-on way to learn about data science and statistics.
Fun and Educational Projects
With the right educational tools, you can embark on projects that are both fun and informative. For example, you could create a weather station that uses sensors to measure temperature, humidity, and light levels, and then display the data on the LED matrix.
Why Focus on Education?
The mBot 2 is a fantastic way to introduce both children and adults to the world of robotics. Its educational tools make learning complex concepts like coding, electronics, and automation accessible and enjoyable.
Optimizing mBot 2 for Better Performance
To get the most out of your mBot 2, it’s essential to optimize its performance. This involves fine-tuning its hardware, software, and overall design to ensure it runs smoothly and efficiently.
Hardware Optimization
- Battery Upgrades: One of the simplest ways to enhance your mBot 2’s performance is by upgrading its battery. A higher-capacity battery will allow your robot to run longer and handle more demanding tasks.
- Motor Calibration: Ensuring that your motors are properly calibrated can improve your mBot 2’s speed and accuracy. Calibration involves adjusting the motor settings so that each motor runs at the same speed and with the same power output.
- Weight Distribution: If you’ve added a lot of components to your mBot 2, it’s important to balance the weight. Uneven weight distribution can affect performance, making the robot unstable or causing it to veer off course.
Software Optimization
- Update Firmware: Regularly updating your mBot 2’s firmware ensures that it’s running the latest software, which can improve performance and fix bugs.
- Code Efficiency: Writing efficient code can make a big difference in how your mBot 2 performs. Avoid unnecessary loops or functions that can slow down the robot’s processing speed.
Why Optimization Matters
Optimizing your mBot 2 is like tuning up a car. It ensures that all components are working together seamlessly, providing the best possible performance and extending the life of your robot.
Conclusion
Enhancing your mBot 2 with add-ons and accessories is more than just an upgrade—it’s an opportunity to unlock the full potential of your robot. Whether you’re adding sensors for better interaction with the environment, using expansion packs to customize its appearance, or diving into advanced controls for automation, each enhancement brings your mBot 2 closer to being the ultimate learning and development tool.
By following the tips and recommendations in this guide, you’ll be well on your way to transforming your mBot 2 into a powerful, versatile, and educational robot. So, what are you waiting for? Start exploring the world of mBot 2 add-ons and accessories today!
FAQs
The best add-ons to start with are sensors like the ultrasonic sensor and the line-following sensor. These add-ons enhance the mBot 2’s ability to interact with its environment and are relatively easy to integrate.
Yes, you can program your mBot 2 using Python, which provides more control and flexibility compared to block-based programming tools like mBlock.
To improve battery life, consider upgrading to a higher-capacity battery and optimizing your mBot 2’s code to reduce power consumption.
Expansion packs provide additional components and accessories that allow you to customize and enhance your mBot 2. They can include new sensors, motors, or structural parts that enable your robot to perform specific tasks.
You can purchase mBot 2 add-ons and accessories from online stores like Promallshop. Be sure to check out the options available to find the best fit for your needs.
