
Introduction
Have you ever tried to setup a sharp printer and felt lost? You’re not alone. Setting up a Sharp printer can feel like trying to assemble a complex puzzle without the picture on the box. But don’t worry—because of this, this guide will clearly break it down into manageable steps. Let’s dive in and transform that tangled mess of cables and instructions into a functioning printer!
Unboxing and Initial Setup
The first step is to unbox your Sharp printer and set it up physically. This includes assembling any parts, plugging in cables, and powering it up.
Steps:
- Unbox the Printer: Carefully take the printer out of its packaging. Ensure all components (like ink cartridges, power cables, and manuals) are included.
- Assemble Parts: Follow the manual to assemble any parts that need to be attached, like paper trays or document feeders.
- Plug in the Printer: Connect the power cable to the printer and an electrical outlet. Press the power button to turn it on.
- Install Ink/Toner Cartridges: Open the cartridge access door and insert the ink or toner cartridges as instructed in the manual.
- Load Paper: Load the paper tray with the correct size and type of paper.
Connecting Sharp Printer to Your Computer
To print documents, your printer needs to be connected to your computer. This can be done via a USB cable or wirelessly.
USB Connection
- Connect USB Cable: Plug one end of the USB cable into your printer and the other end into your computer.
- Power On: Ensure the printer is powered on.
- Install Drivers: Windows should automatically detect the printer and install the necessary drivers. If not, follow the driver installation steps below.
Wireless Setup: Connecting Sharp Printer to Network
For a clutter-free workspace, setting up your Sharp printer wirelessly is a great option. This allows you to print from any device connected to the same network.
- Access Printer Menu: On the printer’s control panel, navigate to the network settings.
- Select Wireless Setup: Choose the wireless setup wizard and follow the prompts to select your Wi-Fi network.
- Enter Wi-Fi Password: Enter your Wi-Fi password using the on-screen keyboard.
- Confirm Connection: After connecting, the printer will show a confirmation message on the display.
Installing Sharp Printer Driver
The printer driver is essential software that allows your computer to communicate with the printer. Here’s how to install it:
- Download Driver: First, visit the Sharp Official Website, and then search for your printer model (e.g., Sharp BP30C25).
- Select OS: Choose the correct driver for your operating system (Windows 10, Windows 11, etc.).
- Download and Install: Adhere to the on-screen instructions to complete the download and installation of the driver.
Configuring Sharp Printer on Different Windows Versions
The process of setting up your Sharp printer differs slightly based on the Windows version you are using.
Configuring Sharp Printer on Windows 10
- Open Settings: Go to ‘Settings’ > ‘Devices’ > ‘Printers & scanners’.
- Add a Printer: Select ‘Add a printer or scanner’. Windows will search for available printers.
- Select Your Printer: Once your printer appears, simply select it and then click ‘Add device’.
Windows 7
- Open Control Panel: Go to ‘Control Panel’ > ‘Devices and Printers’.
- Add a Printer: Click ‘Add a printer’ at the top of the window.
- Choose Network or Local: First, choose whether to add a network, wireless, or Bluetooth printer.
- Follow Prompts: Follow the on-screen instructions to complete the setup.
On Windows 11
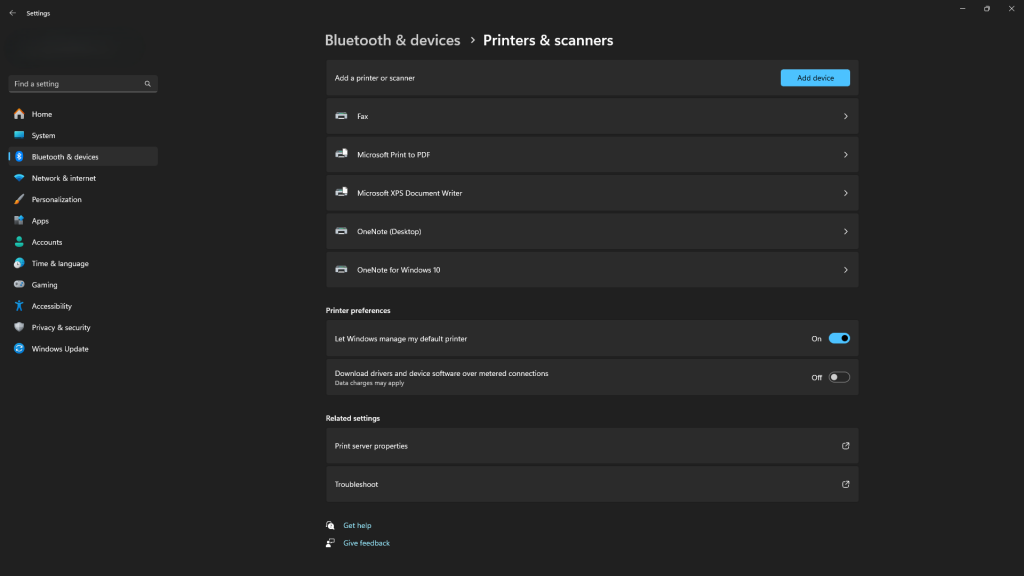
- Open Settings: Go to ‘Settings’ > ‘Bluetooth & devices’ > ‘Printers & scanners’.
- Add a Printer: Click on ‘Add device’ and choose ‘Add a printer or scanner’.
- Select Your Printer: Wait for Windows to detect your printer; once it appears, select it from the list.
- Follow Prompts: To finalize the process, carefully follow any additional on-screen instructions.
Conclusion
Setting up a Sharp printer doesn’t have to be a hassle. By following these step-by-step instructions, you can easily get your printer up and running. Whether you’re connecting via USB or setting it up wirelessly, these steps ensure a smooth process. More importantly, remember that the key to a successful setup is carefully following the instructions and, above all, taking it one step at a time. Looking to purchase a Sharp Printer, click here.
FAQs
To find the IP address, print a network configuration page from your printer’s settings menu. This page will display the IP address along with other network details.
Download the driver from the Sharp website, select the appropriate version for Windows 11, and follow the installation prompts. Restart your computer after installation to ensure the driver works correctly.
Yes, follow the wireless setup instructions in the printer’s menu to connect it to your Wi-Fi network. Ensure your laptop is on the same network to print wirelessly.
Check if the Wi-Fi password is entered correctly and ensure the printer is within range of the router. Restarting the router and printer can also resolve connectivity issues.
Visit the Sharp official website, navigate to the support section, and search for your printer model to find and download the appropriate drivers for Windows 10 64-bit.