
Introduction
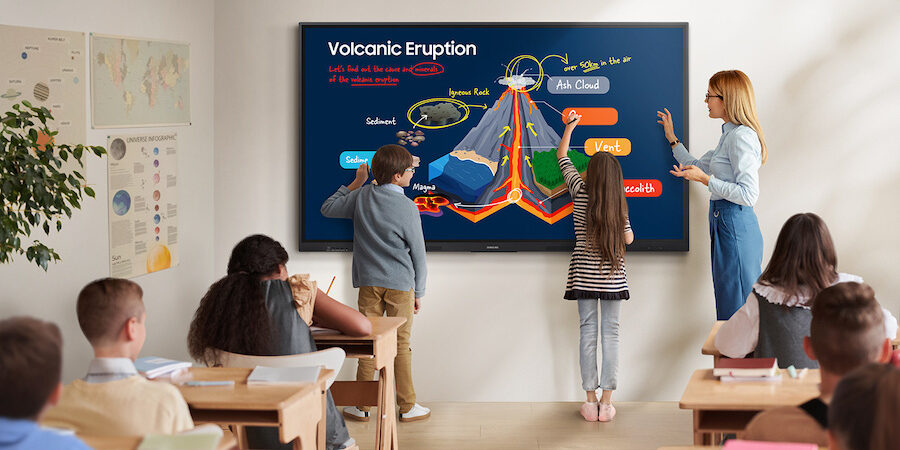
If you want your students to actually enjoy learning, you need to mount interactive whiteboards effectively. It’s not just about tech—it’s about transforming classrooms into immersive, dynamic learning environments.
Mounting an interactive whiteboard sounds simple, right? You find a wall, drill some holes, and you’re done. But here’s the truth: how you mount it can make or break student engagement. Imagine trying to read a book with the words half cut off or flipped sideways—frustrating, isn’t it? The same goes for whiteboards placed too high, too low, or awkwardly angled.
Table of Contents
- Introduction
- Why Mounting Matters in a Classroom Setting
- Choosing the Right Wall and Location
- Optimal Whiteboard Height for Classrooms
- Interactive Board Mounting Tips for Every Space
- Secure Smartboard Wall Mount Solutions
- Tools You Need for a Smooth Installation
- Ergonomic Board Positioning for All Ages
- Interactive Display Wall Placement: Mistakes to Avoid
- Classroom Tech Setup Strategies that Work
- Conclusion
- FAQs
Why Mounting Matters in a Classroom Setting
Think of your whiteboard as the main stage of your classroom. If it’s not set right, everything else falls flat. Students at the back can’t see clearly, younger kids strain their necks, and the teacher struggles to interact naturally.
Mounting isn’t just about placement. It’s about creating an environment where every student stays engaged, from the front row to the very last seat. This is why learning to mount interactive whiteboards effectively is so essential.
Choosing the Right Wall and Location
Before you drill a single hole, step back and analyze your classroom layout. Is there glare from windows? Are there power outlets nearby? Can all students see the board without obstruction?
Here are a few simple rules:
- Choose a central wall visible to every student.
- Avoid direct sunlight to minimize glare.
- Stay close to power and data connections.
If you’re working with a tight or oddly-shaped classroom, flexible mounting arms or mobile stands may be your best friends.
Optimal Whiteboard Height for Classrooms
This one’s crucial. Mount your whiteboard too high, and younger students won’t reach it. Too low, and tall teachers hunch over all day. The solution?
Follow these general height guidelines:
- For younger classrooms (ages 5–10): mount so the center of the board is about 48–52 inches from the floor.
- For older students and adults: 58–60 inches from the floor to the board’s center works best.
These smartboard height guidelines ensure comfort and accessibility for both teaching and interaction.
Interactive Board Mounting Tips for Every Space
Mounting a whiteboard isn’t one-size-fits-all. Whether your classroom is traditional or modern, consider these practical tips:
- Test visibility from every angle before finalizing placement.
- Use a template or level to keep things aligned.
- Install on a flat, stable surface to prevent wobbling.
- Consider adjustable mounts if multiple teachers share the space.
This is how you truly begin to mount interactive whiteboards effectively, not just quickly.
Secure Smartboard Wall Mount Solutions
Safety first—always. An improperly mounted whiteboard can be a hazard.
Choose a secure smartboard wall mount that can bear the weight and usage over time. Here’s what to look for:
- Reinforced brackets
- Anchors suitable for concrete or drywall
- Tilt and swivel adjustability, especially for touchscreen models
If you’re unsure which model to get, visit shop Video Conferencing Accessories to see secure and affordable mounting solutions.
Tools You Need for a Smooth Installation
Installing an interactive whiteboard doesn’t have to be a struggle if you’ve got the right gear. Think of it like baking—without the right utensils, even the best ingredients won’t help.
Here are the best tools for whiteboard mounting:
- Power drill with screwdriver bits
- Level and measuring tape
- Mounting brackets (usually included with the board)
- Stud finder
- Anchors and screws suitable for wall type
If you’re looking for a one-stop shop for these tools, check out our recommendations on shop Video Conferencing Accessories.
Ergonomic Board Positioning for All Ages
Every classroom has a different audience. A room full of six-year-olds will need a drastically different setup than a high school science lab.
Here’s where ergonomic board positioning comes into play:
- Use adjustable wall mounts for mixed-age classrooms.
- Install mobile stands if you need to move between rooms.
- Ensure there’s ample clearance around the board for safe movement.
This helps both students and teachers stay comfortable and focused.
Interactive Display Wall Placement: Mistakes to Avoid
Don’t let poor planning ruin your installation. Avoid these common mistakes:
- Placing boards too close to projectors (hello, shadows!)
- Blocking classroom resources like bookshelves or posters
- Ignoring student sightlines, especially for students with vision needs
A well-planned interactive display wall placement creates an inclusive and distraction-free zone for learning.
Classroom Tech Setup Strategies that Work
Setting up your tech shouldn’t feel like defusing a bomb. Make it simple and intentional.
Try these classroom tech setup strategies:
- Consolidate cables using cable management kits
- Pair your board with reliable Wi-Fi and audio systems
- Use wireless accessories to reduce clutter
For more classroom tech ideas, explore our blog here.
Conclusion
A whiteboard may seem like just a teaching tool, but when you mount interactive whiteboards effectively, it becomes the centerpiece of dynamic, inclusive learning. With the right height, secure mounting, and thoughtful placement, your classroom transforms from static to electric.
Ready to upgrade your classroom? Browse our range of mounts, tools, and accessories on shop Video Conferencing Accessories—where convenience meets quality.
FAQs
The ideal center height is 48–52 inches for younger students and 58–60 inches for older students and adults.
Yes, but ensure you use proper drywall anchors and that the mount is rated for the board’s weight.
Not always. Some include basic hardware, but you may need to purchase more secure options separately.
Avoid placing it opposite windows or under direct lighting. Use window blinds or anti-glare coatings if necessary.
Mobile stands offer flexibility, while wall mounts provide stability. Choose based on your classroom’s needs.