
Introduction
Mounting your Yealink T33G on a wall can be a great way to save space, keep your desk clutter-free, and enhance accessibility. Whether you’re setting it up in an office or at home, this guide will walk you through the Yealink T33G wall mount installation process, ensuring a secure and professional setup.
Table of Contents
Why Wall Mount Your Yealink T33G?
Wall mounting your Yealink T33G offers multiple benefits. It helps keep your workspace organized, prevents accidental drops, and ensures easy access to the phone controls. Whether in a busy office or home workspace, having the phone securely mounted improves efficiency.
What You Need for Wall Mounting
Before starting the Yealink T33G mounting bracket setup, gather the necessary tools:
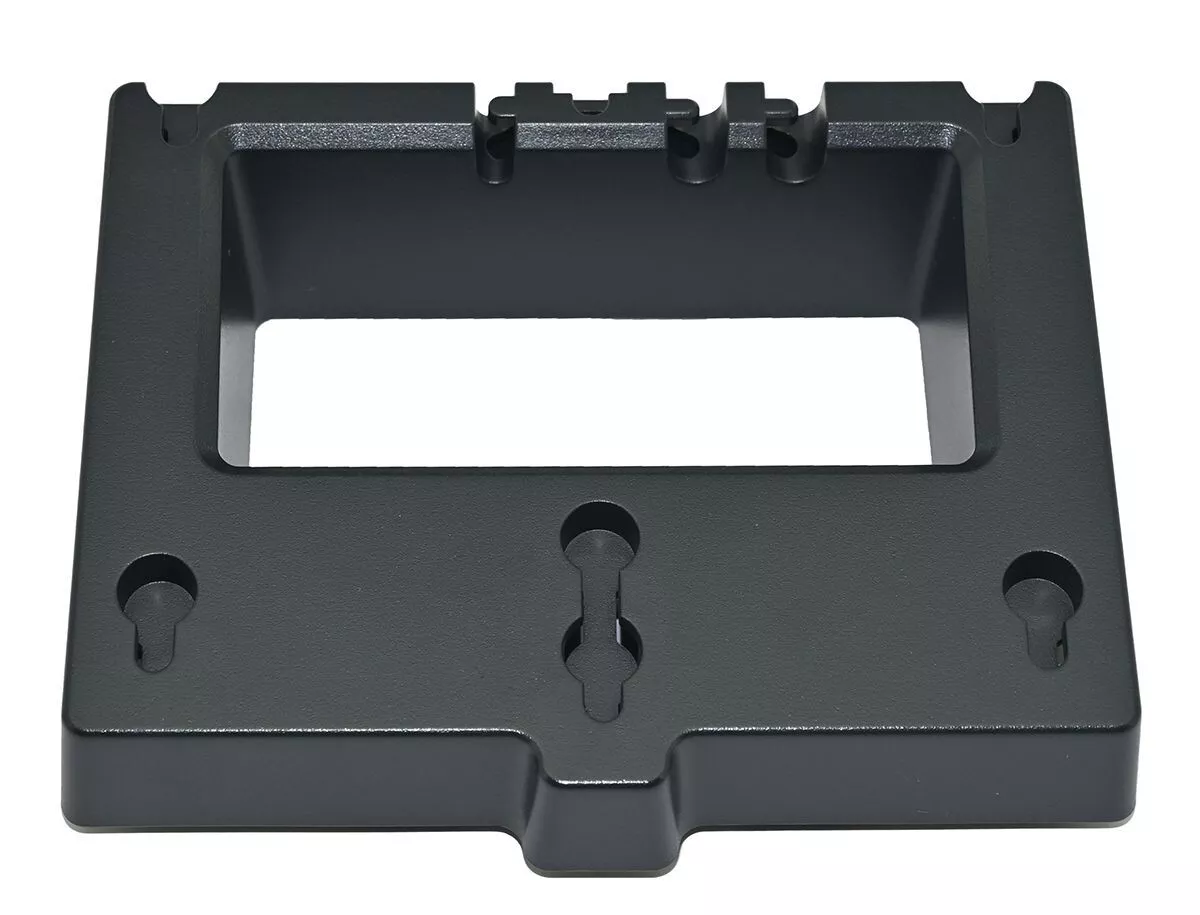
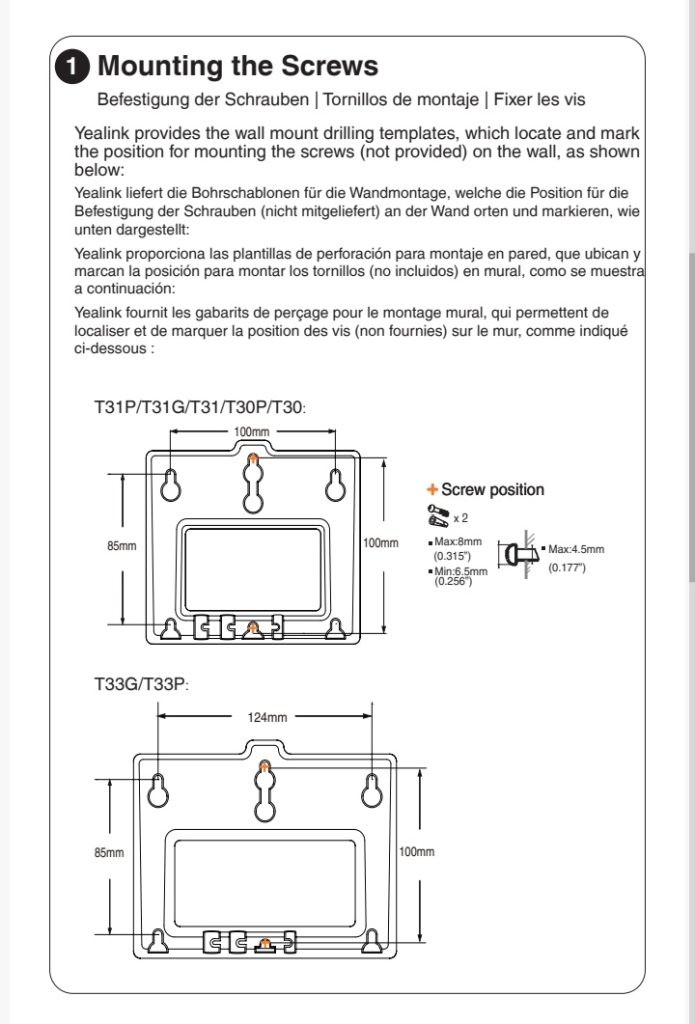
- Yealink T33G WMB-T33G wall mount bracket
- Screws and wall anchors (typically included with the bracket)
- Drill and screwdriver
- Level tool (to ensure proper alignment)
Step-by-Step Yealink T33G Wall Mount Installation
1. Preparing the Wall and Bracket
- Choose a wall location that is easily accessible and has minimal obstruction.
- Mark the mounting points using a pencil and the bracket as a guide.
- Drill holes and insert wall anchors to secure the screws.
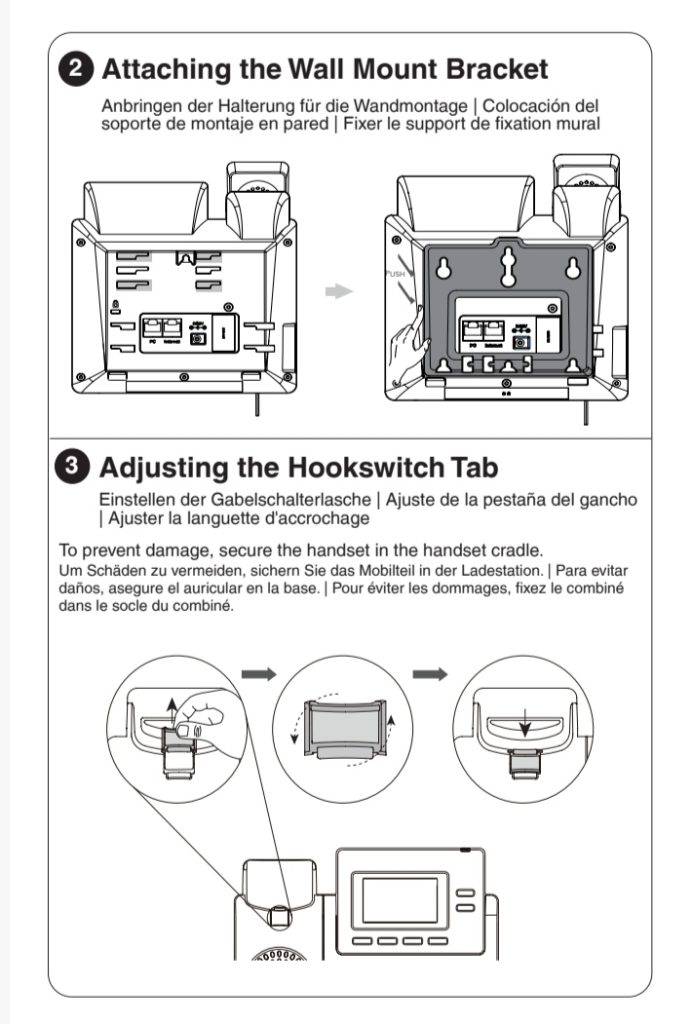
2. Attaching the Mounting Bracket
- Align the bracket with the drilled holes and secure it using screws.
- Ensure that the bracket is level to prevent misalignment.
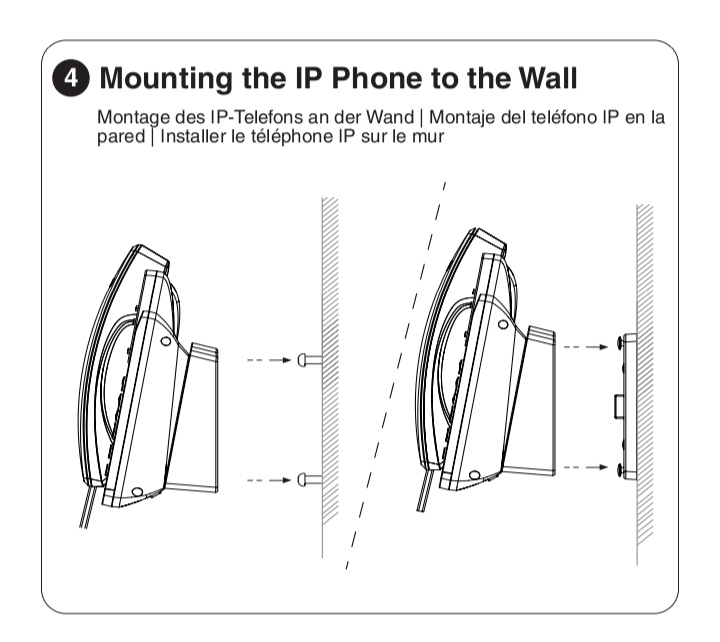
3. Securing the Yealink T33G on the Wall
- Attach the phone to the bracket by aligning it with the slots.
- Firmly press down to lock the phone into place.
- Connect the power and network cables neatly to avoid obstruction.
Best Practices for Yealink T33G Wall Mounting
- Keep the phone at a comfortable height for easy access.
- Avoid mounting near heat sources or direct sunlight.
- Ensure cables are secured to prevent tangling or damage.
Troubleshooting Common Wall Mounting Issues
If you encounter issues during the Yealink T33G wall-mount troubleshooting, consider these fixes:
- Phone not locking into bracket? Re-check alignment.
- Loose bracket? Tighten the screws.
- Unstable mount? Use stronger wall anchors for better support.
Adjusting the Position for Better Accessibility
- If multiple users will access the phone, mount it at a universal height.
- Ensure visibility of the LCD screen and keypad for easy use.
Final Checks Before Using the Phone
- Confirm all cables are securely connected.
- Perform a test call to ensure functionality.
- Adjust positioning if needed for a better user experience.
FAQs
Yes, but for drywall, you may need additional anchors to ensure stability.
The bracket is usually sold separately. You can purchase it from authorized retailers.
The recommended height is 48-52 inches from the floor, ensuring accessibility.
No, but ensure the speaker and microphone are not obstructed for clear audio.
You can shop Yealink T33G at Promallshop for competitive pricing.
This guide ensures a seamless Yealink T33G VoIP phone wall setup. If you need more expert advice, check out other related posts on Promallshop Blog.