Introduction
In the modern world, security is a growing concern. Whether it’s for your home, office, or any other space, ensuring the safety of your property is paramount. With the evolution of technology, security cameras have become an essential part of any surveillance setup. However, managing these cameras can sometimes be tricky. That’s where ONVIF comes into play. ONVIF (Open Network Video Interface Forum) is a global standard for the interface of IP-based security products, ensuring that devices from different manufacturers work together seamlessly. If you’re wondering how to use ONVIF to enhance your security camera setup, you’re in the right place. This article will guide you step by step on how to make the most out of ONVIF for your cameras.
What is ONVIF and How Does it Work?
ONVIF, or the Open Network Video Interface Forum, is an international standard for the development of IP-based physical security products. It was established to create a standardized way for security devices (like cameras and network video recorders, NVRs) to communicate with each other, regardless of the manufacturer. This means that if you have an ONVIF-compatible camera, it can work seamlessly with any ONVIF-compliant NVR, even if the camera and NVR come from different brands.
Think of it like a universal translator for your security system. No matter which brand you’re using, ONVIF ensures that they can “speak the same language” and work together smoothly. This helps to avoid compatibility issues, saves you from having to buy all your devices from the same manufacturer, and gives you the flexibility to mix and match various devices based on your needs.
How to Connect via ONVIF?
Connecting via ONVIF may seem daunting at first, but it’s much easier than it sounds. Here’s a step-by-step guide on how to connect your devices through ONVIF:
- Ensure Compatibility: First, make sure your camera and NVR support ONVIF. Most modern IP cameras and NVRs are ONVIF-compatible, but it’s always good to check.
- Network Configuration: Connect both your camera and NVR to the same network. This could either be a local area network (LAN) or a wireless connection, depending on your setup.
- Enable ONVIF Protocol: Most devices have ONVIF turned on by default, but you may need to enable it manually in the camera or NVR settings.
- Use ONVIF Device Manager: This free software can help you discover and manage ONVIF-compliant devices on your network. Once you open it, it will automatically detect available devices that support the ONVIF protocol.
- Enter Credentials: After detecting the camera or NVR, enter the required username and password (usually found in the device’s manual or setup screen) to gain access.
- Start Viewing: Once connected, you can start viewing the camera feed, adjusting settings, and monitoring your security system.
This process ensures that you can easily link various security devices without worrying about brand compatibility.
How to View ONVIF Camera?
Viewing your ONVIF camera feed is essential to monitor the security of your property. You can use several methods to do this:
- Via NVR: If you have an ONVIF-compatible NVR, you can view your camera feed directly from there. Simply connect your camera through ONVIF and access it through your NVR interface.
- ONVIF Client Software: Programs like ONVIF Device Manager allow you to view multiple camera feeds from different brands all at once. With ONVIF client software, you can also adjust the settings of your cameras remotely.
- Mobile Apps: There are various mobile apps that allow you to monitor ONVIF cameras remotely, including ONVIF-compatible apps available on Android and iOS. These apps typically allow you to view live footage, control PTZ (Pan-Tilt-Zoom) cameras, and playback recordings.
- Web Interface: Some cameras allow you to access the live feed through a web interface. Just type the IP address of your camera into a browser, log in, and start viewing.
By using any of these methods, you can easily monitor your ONVIF camera feeds from anywhere.
How to Enable ONVIF Protocol on Your IP Camera?
To make your IP camera ONVIF-compatible, you need to ensure that the ONVIF protocol is enabled in its settings. Here’s how to do that:
- Access the Camera’s Web Interface: Using the camera’s IP address, log into the web interface of your camera.
- Navigate to Network Settings: Once logged in, find the network settings section. This is where you’ll find the option to enable or disable ONVIF.
- Enable ONVIF: There should be a checkbox or toggle option to turn ONVIF on. Once enabled, save the settings.
- Set a Username and Password: ONVIF often requires a specific username and password for access, so make sure to configure this under the User Management section.
- Save Settings and Reboot: After saving the settings, reboot the camera for the changes to take effect.
Once ONVIF is enabled, your camera will be ready to be integrated with other ONVIF-compatible devices.
Using ONVIF Software: Tools and Applications
ONVIF-compliant software and tools are indispensable when managing a network of security cameras. These tools allow you to connect, control, and monitor multiple cameras from different manufacturers all in one place.
- ONVIF Device Manager (ODM): This free software allows you to find and connect all ONVIF-compatible devices on your network. It provides basic functionality like viewing live video streams, adjusting camera settings, and managing multiple devices at once.
- ONVIF NVR Software: If you prefer software-based NVRs, many options are available that support ONVIF cameras. These software solutions enable recording, playback, and live viewing of your camera feeds.
- Mobile ONVIF Apps: Apps like ONVIF IP Camera Monitor allow you to use your smartphone or tablet to monitor and control ONVIF cameras remotely.
By using the right ONVIF software, you’ll enhance your ability to manage and monitor your security system, making your surveillance setup more efficient and accessible.
The Importance of ONVIF NVR in Your Setup
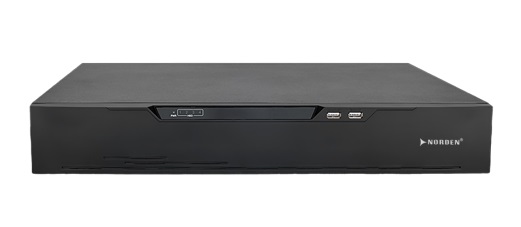
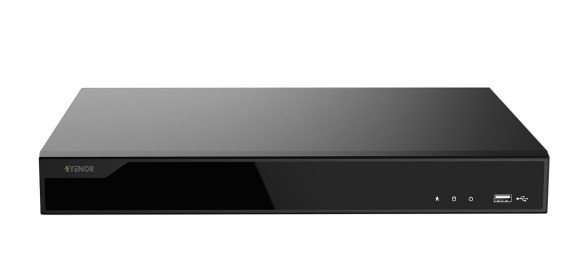
An ONVIF NVR (Network Video Recorder) is crucial for any modern security setup. Unlike traditional DVRs, ONVIF NVRs can work with IP cameras from different manufacturers, thanks to the ONVIF standard. Here’s why it’s so important:
- Centralized Monitoring: An ONVIF NVR allows you to connect all your ONVIF cameras in one centralized location. You can view all feeds from a single screen, which makes monitoring much more efficient.
- Scalability: As your security needs grow, you can add more cameras to your system without worrying about compatibility issues, as long as the cameras are ONVIF-compatible.
- Easy Remote Access: ONVIF NVRs usually offer easy remote access through mobile apps or web browsers, so you can monitor your cameras from anywhere.
Using an ONVIF NVR streamlines your security system and makes it easier to expand and manage.
Troubleshooting Common ONVIF Issues
Even though ONVIF is designed to make life easier, sometimes things don’t go as smoothly as expected. Here are a few common problems and their solutions:
- Device Not Detected: Ensure both the camera and NVR are on the same network and check if ONVIF is enabled on both devices.
- Wrong Credentials: If you’re having trouble logging into your camera or NVR, verify that the username and password are correctly entered.
- Poor Video Quality: This can happen if your camera’s resolution is set too high for the network to handle. Try lowering the resolution or optimizing the bandwidth settings.
- Incompatible Firmware: Ensure that the firmware on your camera and NVR is up to date, as older firmware may cause compatibility issues.
By addressing these issues promptly, you can keep your ONVIF-based system running smoothly.
Conclusion
Using ONVIF to enhance your security camera setup is a great way to ensure compatibility, flexibility, and ease of use. Whether you’re connecting devices, viewing your cameras remotely, or managing your system with ONVIF software, this open standard provides the tools to optimize your surveillance experience. By following the steps outlined in this guide, you can get the most out of your security system and rest easy knowing your property is protected by cutting-edge technology.
FAQs
How do I enable ONVIF protocol on my IP camera?
Log into your camera’s web interface, find the ONVIF settings, enable the protocol, and configure the ONVIF port and user permissions.
What is the ONVIF port, and why is it important?
The ONVIF port is a specific communication channel (default is often 8080). It ensures seamless device communication within your network.
How to use ONVIF apps for mobile monitoring?
Download an ONVIF-compatible app, enter your camera’s IP address, credentials, and ONVIF port, and access live feeds directly from your smartphone.
What’s the difference between ONVIF-compliant and proprietary cameras?
ONVIF-compliant cameras work across multiple brands, while proprietary cameras are limited to their specific ecosystem.
What tools are best for managing ONVIF cameras?
Tools like ONVIF Device Manager, Blue Iris, and iSpy are excellent for managing, viewing, and troubleshooting ONVIF devices.
