
Introduction
Ever dreamed of building your own robot? Well, with the mBot Ranger, you’re just a few steps away from turning that dream into reality. This friendly little robot helps make coding and robotics accessible to everyone, from kids to adults. In this guide, we’ll take you on a journey through the exciting world of mBot Ranger programming. We’ll start with the basics, then dive into more advanced techniques. Whether you’re a complete beginner or have some coding experience, there’s something here for you. So, let’s get started!
Getting Started with mBot Ranger
What is mBot Ranger?
The mBot Ranger is a versatile educational robot that can be used for a variety of purposes. It’s equipped with a variety of sensors and actuators, making it ideal for learning about robotics, coding, and electronics.
Unboxing and Setup
Once you’ve received your mBot Ranger kit, it’s time to assemble it. The kit comes with detailed instructions, so you should be able to put it together without too much trouble.
Connecting mBot Ranger to Your Computer
To program the mBot Ranger, you’ll need to connect it to your computer. You can do this using a USB cable or via Bluetooth. The specific method will depend on the programming environment you’re using.
Introduction to Scratch Programming
What is Scratch?
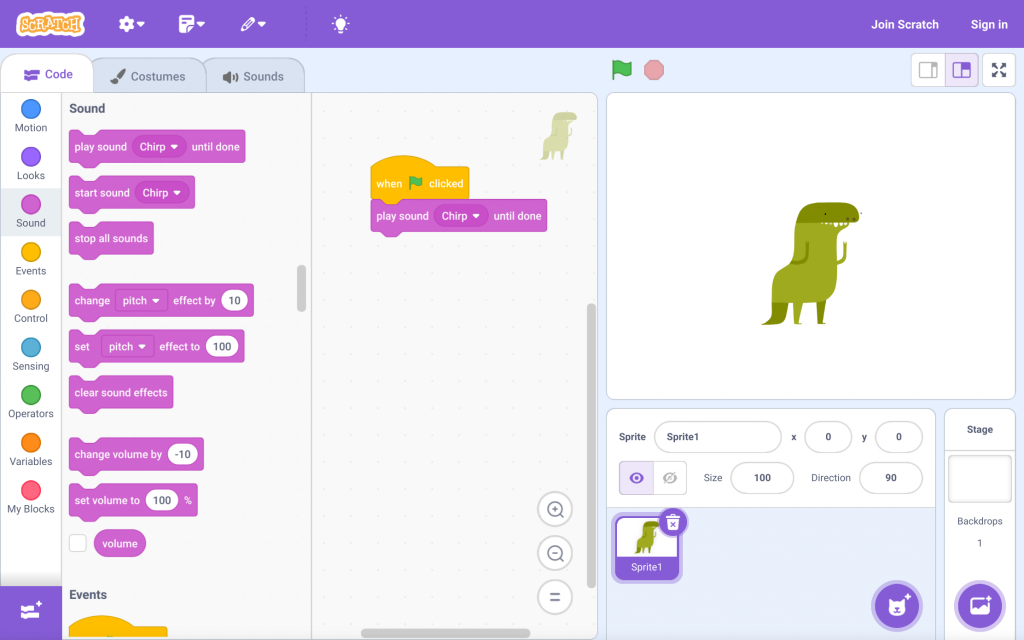
Scratch is a visual programming language that’s perfect for beginners. It uses a drag-and-drop interface, making it easy to create interactive projects without writing lines of code.
Creating Your First Scratch Project
To create your first Scratch project, simply launch the Scratch software and start dragging blocks together. You can use these blocks to control the mBot Ranger’s movement, lights, and sensors.
Controlling mBot Ranger with Scratch
Once you’ve created your first Scratch project, you can use it to control the mBot Ranger. For example, you could create a project that makes the mBot Ranger move forward, turn left, or play a sound.
Advanced Scratch Programming
Using Sensors with Scratch
The mBot Ranger has a variety of sensors, including a line follower, an ultrasonic sensor, and a light sensor. You can use these sensors to create more complex behaviors in your Scratch projects.
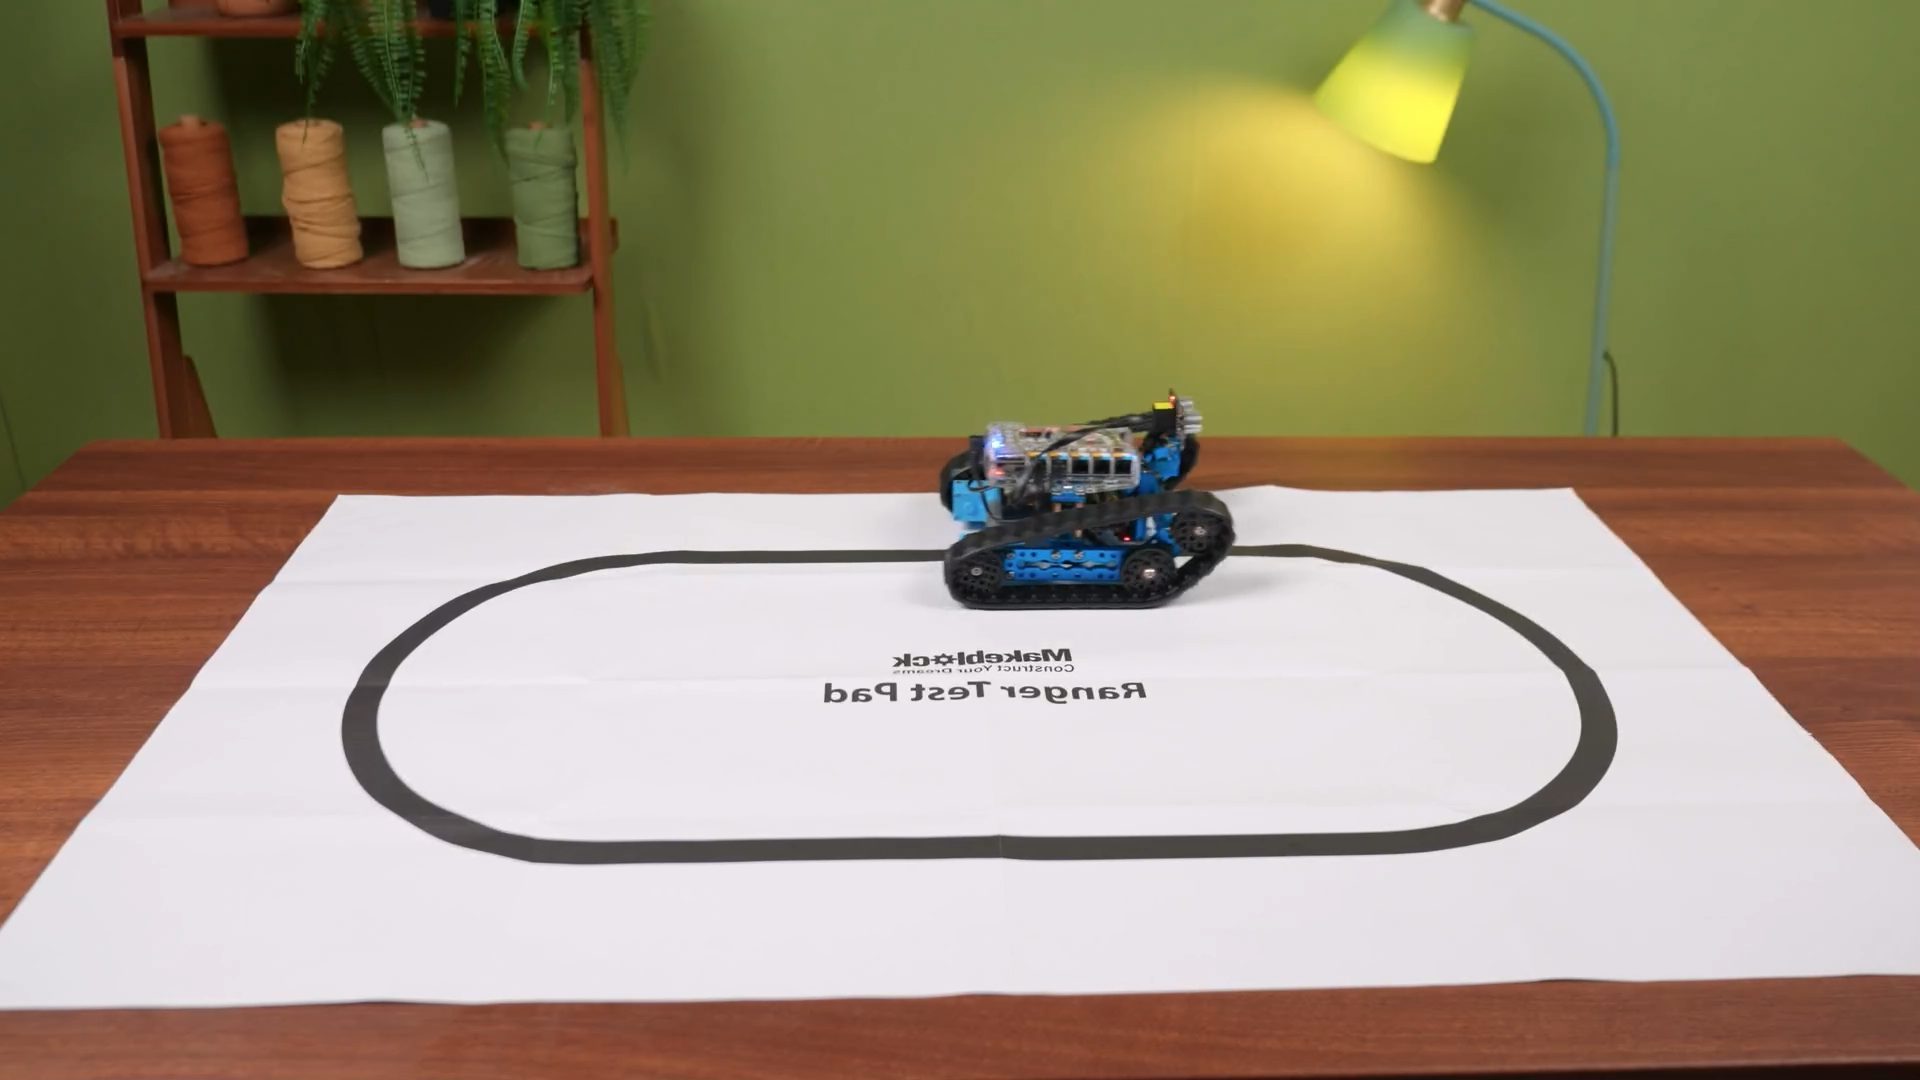
Creating Autonomous Behaviors
By combining sensors with programming blocks, you can create autonomous behaviors for your mBot Ranger. For example, you could create a project that makes the mBot Ranger follow a line or avoid obstacles.
Building Games and Simulations
You can also use Scratch to create games and simulations. For example, you could create a game where the mBot Ranger has to navigate a maze or a simulation of a self-driving car.
Programming mBot Ranger with Arduino
What is Arduino?
Arduino is a popular open-source platform for building electronic projects. A microcontroller board forms the basis of the system, and you can program it using a variety of languages, including C and C++.
Setting Up the Arduino IDE
To program the mBot Ranger with Arduino, you’ll need to install the Arduino Integrated Development Environment (IDE). This software provides a platform for writing and uploading code to your Arduino board.
Writing Your First Arduino Code
Once you’ve installed the Arduino IDE, you can start writing code. Arduino code is typically written in C or C++. You can use the Arduino IDE to compile and upload your code to the mBot Ranger.
Advanced Arduino Programming
Interfacing with mBot Ranger’s Hardware
The mBot Ranger’s hardware can directly interface with Arduino. For example, you can use Arduino to control the mBot Ranger’s motors, lights, and sensors.
Creating Complex Robotic Behaviors
By combining Arduino with sensors and actuators, you can create complex robotic behaviors. For example, you could create a project that makes the mBot Ranger follow a line, avoid obstacles, or play a game.
Using Libraries and Frameworks
There are many libraries and frameworks available for Arduino that can simplify your programming tasks. For example, you could use a library to control the mBot Ranger’s ultrasonic sensor or a framework to create a state machine.
Other Programming Languages for mBot Ranger
Python for mBot Ranger
In addition to Scratch and Arduino, you can also program the mBot Ranger with Python. Python is a popular general-purpose programming language that’s easy to learn.
Other Languages and Platforms
There are other programming languages and platforms that can be used with the mBot Ranger, such as C#, Java, and JavaScript. However, Scratch, Arduino, and Python are the most popular options.
Troubleshooting and Tips
Common Issues and Solutions
If you encounter problems while programming the mBot Ranger, don’t worry. Here are some common issues and their solutions:
- Connection problems: Ensure that the mBot Ranger is properly connected to your computer.
- Code errors: Double-check your code for syntax errors.
- Hardware issues: If your mBot Ranger is not working correctly, check the hardware for any damage.
Tips for Successful Programming
Here are some tips for successful programming with the mBot Ranger:
- Start small: Begin with simple projects and gradually increase the complexity.
- Experiment: Don’t be afraid to try new things and experiment with different programming techniques.
- Seek help: If you’re stuck, don’t hesitate to seek help from the online community or your teacher.
Conclusion
The mBot Ranger is a versatile and fun robot that can be used to learn about coding, robotics, and electronics. By following the steps in this guide, you can start programming your own mBot Ranger projects. With a little patience and practice, you’ll be able to create amazing things. For more on mBot you can read on what is mBot An Overview Of Its Capabilities
FAQs
You can use Scratch, Arduino, Python, and other languages with mBot Ranger.
You can connect mBot Ranger to your computer using a USB cable or via Bluetooth.
Scratch is a great option for beginners, as it’s easy to learn and use.
Yes, you can use mBot Ranger to build games and simulations.
There are many online resources available, including tutorials, forums, and communities.