

Introduction
Have you ever wondered how to bring your imagination to life through robotics? With the mBot 2, you can turn your ideas into reality, whether you’re a beginner or an advanced enthusiast. This versatile and user-friendly robot is designed to make learning and experimenting with robotics fun and accessible. Imagine building a robot that can navigate obstacles, follow lines, or even interact with its environment—all with the mBot 2. In this article, we’ll dive into a range of robotics from basic to advanced mbot 2 projects, and from the simplest tasks to more complex challenges. Whether you’re a parent looking to introduce your child to STEM, an educator searching for classroom activities, or a hobbyist eager to explore advanced robotics, there’s something here for everyone.
Getting Started with mBot 2
Setting Up Your mBot 2
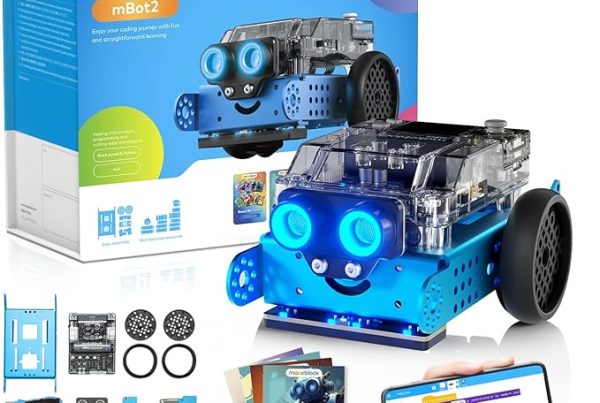
Before you dive into the exciting world of robotics, you’ll need to set up your mBot 2. The setup process is straightforward, with easy-to-follow instructions. Start by assembling the robot using the provided kit. The components snap together like puzzle pieces, making it a breeze even for beginners. Once assembled, connect the mBot 2 to your computer or tablet via Bluetooth or USB. You’ll be using software like mBlock, a block-based coding platform that’s perfect for both beginners and those looking to delve into more advanced programming.
Understanding Basic Components
The mBot 2 comes equipped with various components that are the building blocks of your projects. These include motors, sensors, LEDs, and a microcontroller. Understanding these components is crucial, as they are the tools you’ll use to bring your robot to life. For instance, the ultrasonic sensor allows your robot to detect obstacles, while the line-following sensor helps it stay on track. These components work together to execute the commands you program.
Beginner Projects with mBot 2
Project 1: Line Following Robot
One of the most popular beginner projects is creating a line-following robot. Imagine your mBot 2 gliding smoothly along a path, following a line you’ve drawn. This project is an excellent way to get acquainted with the basics of programming and sensor integration. Using the line-following sensor, your mBot 2 can detect and follow a black line on a white surface. The project involves programming the robot to adjust its speed and direction based on the sensor’s input, ensuring it stays on the path.
Project 2: Obstacle Avoidance Robot
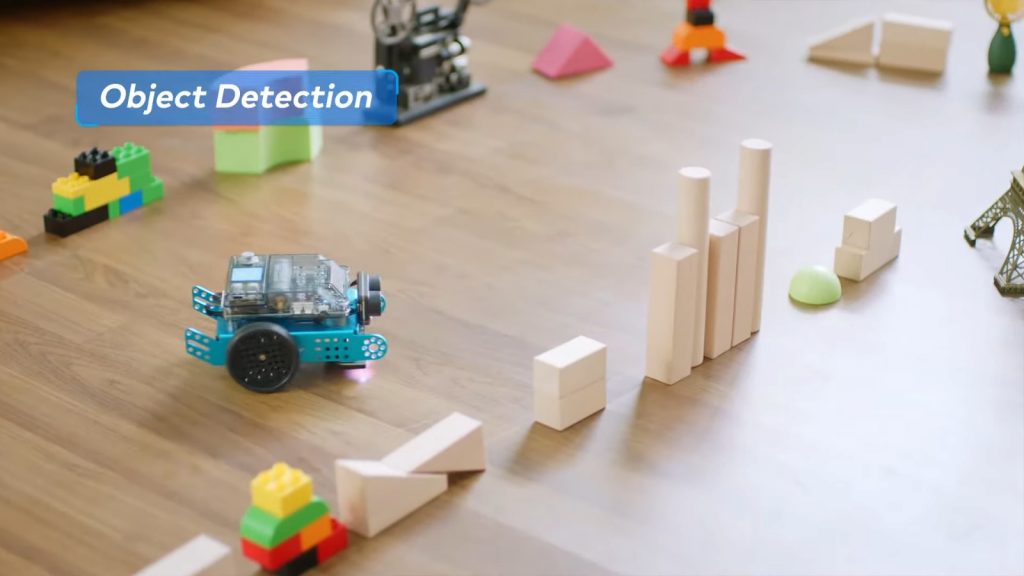
Another great project for beginners is building an obstacle avoidance robot. This robot can navigate around obstacles in its path, a feature that is both practical and fun to watch in action. By using the ultrasonic sensor, the mBot 2 can detect objects in its path and change direction accordingly. This project helps you understand how sensors interact with the robot’s movements, offering a hands-on experience with real-world applications of robotics.
Intermediate mBot 2 Projects
Project 3: Remote Control mBot 2
Taking a step further, why not try creating a remote control mBot 2? In this project, you’ll learn how to control your robot using a smartphone or tablet. This project introduces wireless communication between the mBot 2 and your device, allowing you to drive your robot around, control its speed, and even make it perform tricks. It’s a fun way to explore the possibilities of remote-controlled robotics, adding a layer of interaction to your projects.
Project 4: Light-Seeking Robot
For those ready to tackle a more challenging project, the light-seeking robot is a perfect choice. This project involves programming the mBot 2 to detect and move towards light sources. By using the light sensor, your robot will seek out the brightest area in a room. This project is not only fascinating to watch but also teaches important concepts about sensors and environmental interaction. You’ll gain a deeper understanding of how robots can be programmed to respond to their surroundings.
Advanced mBot 2 Projects
Project 5: AI-Powered mBot 2
If you’re ready to push the boundaries here are some advanced mbot 2 projects, try your hand at creating an AI-powered mBot 2. This project involves integrating artificial intelligence into your robot, enabling it to perform tasks autonomously. For example, you could program your mBot 2 to recognize objects and make decisions based on what it “sees.” Using advanced algorithms and possibly even machine learning, this project will challenge your coding skills and expand your knowledge of AI in robotics.
Project 6: mBot 2 with Voice Recognition
Voice recognition is a rapidly growing field, and you can incorporate it into your advanced mBot 2 projects. Imagine controlling your robot with simple voice commands like “move forward” or “turn left.” This project involves using voice recognition software to convert spoken words into commands that the mBot 2 can execute. It’s an advanced project that combines programming, speech processing, and robotics, offering a glimpse into the future of human-robot interaction.
Coding Challenges with mBot 2
Challenge 1: Programming a Maze Solver
For those who love a good challenge, try programming your mBot 2 to solve a maze. This project involves writing code that allows your robot to navigate through a maze without human intervention. You’ll need to use sensors to detect walls and obstacles, and create algorithms that help the robot find the exit. It’s a fun and educational way to test your problem-solving skills and see just how smart your mBot 2 can be.
Challenge 2: Creating a Dance Routine
Why not add a bit of fun to your coding projects by programming your mBot 2 to perform a dance routine? This challenge is all about creativity and precision. You’ll write a program that synchronizes the robot’s movements to a piece of music, making it “dance” along with the beat. This project teaches timing, sequencing, and the importance of attention to detail in programming.
Integrating Sensors with mBot 2
Sensor Integration Basics
Sensors are the eyes and ears of your robot, and learning how to integrate them is key to creating more advanced projects. The mBot 2 comes with several sensors, including ultrasonic, infrared, and light sensors. Each sensor has a specific purpose, and by combining them, you can create robots that interact intelligently with their environment. Understanding sensor integration is like learning to drive – once you get the hang of it, the possibilities are endless.
Using Ultrasonic Sensors
The ultrasonic sensor is one of the most versatile tools in your mBot 2 kit. It works by emitting sound waves and measuring the time it takes for them to bounce back from an object. This allows your robot to detect the distance to an obstacle, making it essential for projects like obstacle avoidance and maze-solving. Integrating this sensor into your projects will open up a world of possibilities.
Using Infrared Sensors
Infrared sensors are another powerful tool for your mBot 2. These sensors can detect objects based on the heat they emit or the reflection of infrared light. They’re perfect for projects that require your robot to detect and follow objects or avoid obstacles. Understanding how to use infrared sensors will add another layer of functionality to your mBot 2 projects, making them more interactive and responsive.
STEM Activities with mBot 2
Classroom Project Ideas
The mBot 2 is an excellent tool for introducing STEM (science, technology, engineering, and mathematics) concepts in the classroom. Teachers can use it to create engaging lessons that combine theory with hands-on practice. For example, students can learn about basic physics principles by programming their robots to perform specific tasks, such as moving objects or navigating a course. These activities make learning fun and memorable, helping students develop a strong foundation in STEM.
DIY mBot 2 Kits for Home Learning
Parents looking to inspire their children’s interest in technology can use mBot 2 kits for home learning. These kits come with everything needed to build and program a robot, making them perfect for DIY projects. Working on these projects together can be a great bonding experience, and it’s a fantastic way to introduce children to coding and robotics in a fun and engaging way. The hands-on nature of these projects helps reinforce learning and encourages curiosity and creativity.
Competing with mBot 2
Preparing for Robotics Competitions
For those interested in taking their mBot 2 projects to the next level, robotics competitions are a great opportunity. These events allow you to showcase your skills and creativity, competing against others in challenges like obstacle courses, line following, and even robot soccer. Preparing for a competition involves fine-tuning your robot’s design, optimizing your code, and practicing to ensure everything works perfectly on the day. It’s a thrilling experience that can inspire further exploration into the world of robotics.
Tips for Winning
Success in robotics competitions often comes down to preparation and attention to detail. Make sure your robot is well-built and your code is optimized for speed and accuracy. Test your robot in different scenarios to ensure it can handle unexpected challenges. And most importantly, have fun! Competitions are not just about winning; they’re about learning, improving, and enjoying the process.
Purchasing mBot 2
Where to Buy
Ready to start your mBot 2 journey? You can purchase the mBot 2 from various online retailers, including Promallshop, where you’ll find competitive prices and reliable service. Ordering from Promallshop ensures you’re getting an authentic product, complete with all the components you need to start building and programming right away.
Price Overview
The mBot 2 is an affordable entry point into the world of robotics, with prices typically ranging between $150 and $200, depending on the package and accessories included. This price point makes it accessible to a wide audience, from beginners to more experienced hobbyists. The investment is well worth it for the educational value and the countless hours of fun you’ll have exploring robotics with the mBot 2.
Conclusion
The mBot 2 is more than just a robot; it’s a gateway to creativity, learning, and endless possibilities. Whether you’re a beginner just starting out or an advanced user looking for new challenges, there’s a project for you. From simple line-following robots to AI-powered machines, the mBot 2 offers something for everyone.
So, what are you waiting for? Grab your mBot 2, unleash your creativity, and start building something amazing today. And remember, the journey is just as important as the destination. Every project you complete with the mBot 2 is a step towards mastering the exciting world of robotics.
FAQs
The mBot 2 is an educational robot designed for beginners and advanced users alike. It’s suitable for children, educators, hobbyists, and anyone interested in learning about robotics and coding.
Absolutely! The mBot 2 is designed to be user-friendly, with a block-based coding platform that is perfect for beginners. No prior coding experience is necessary to start creating projects.
You can program the mBot 2 using mBlock, a block-based coding platform. mBlock is compatible with Windows, macOS, and mobile devices, making it accessible for all users.
Yes, the mBot 2 is an excellent tool for teaching STEM concepts in classrooms. It offers hands-on learning experiences that can make complex topics more engaging and easier to understand.
You can purchase the mBot 2 from Promallshop and other online retailers. Make sure to check for the best prices and ensure you’re buying from a reliable source.